Hackpads are smart collaborative documents. Join Hackpad Now.

john levi

587 days ago
Unfiled. Edited by john levi 587 days ago
john l Fix QuickBooks Error "The file you specified cannot be opened"
QuickBooks software often encounters several errors that keep hampering users. One such error comes up with the message ‘’The file requested cannot be opened’’. This error is extremely annoying and hampers the work progress. This issue also shows up when you attempt to download or update QuickBooks software and are then unable to apply these updates.
 
However, there are several remedial solutions that you may adopt to get this technical error ("The file you specified cannot be opened error in QuickBooks”) fixed out. Just make sure you finish reading this post and carefully follow all of the instructions contained herein. 
 
Possible Factors that lead to 'The File Specified Cannot Be Opened' Error Message
The error can occur for a number of different reasons. The following are a few of the root causes that may lead to this error:
•        Incomplete or unsuccessful QuickBooks installation can result in this error.
•        Mismatched admin credentials may be a major reason behind this error.
•        Any outdated files for the QuickBooks desktop program.
•        A corrupted or damaged company file can also lead to this technical error.
•        Incorrect Internet security configurations.
•        Unreliable Internet connections
•        Windows user account control interrupted the QuickBooks.
•        If you do not possess admin access to QuickBooks, then also this error may pop up.
 
701 days ago
Unfiled. Edited by john levi , James Ryter 701 days ago
john l Troubleshooting Methods to Fix QuickBooks keeps crashing
You can resort to the below-mentioned methods for fixing the QuickBooks keeps crashing issue in Windows 10.
Method 1: Use the Run QuickBooks File Doctor
The File doctor offers multiple benefits towards eradicating QB related errors and bugs. You can get rid of the ‘QuickBooks keeps crashing issue in Windows 10’ by implementing the tool. Follow the directions below to use it. 
·         Download and Install the QuickBooks Tool Hub
·         On the culminating page of the installation process, click on 'Finish.'
·         Now, launch the QuickBooks Tool Hub.
·         From the QuickBooks Tool Hub, run QuickBooks File Doctor after choosing the 'Company File Issues tab.'
·         Choose the company file after clicking on 'Browse.'
·         Select 'Continue.'
·         Check for the file and network
·         Choose 'Next' after you enter the QuickBooks Admin password.
·         Now the scan begins.
·         This process may take some time.
·         Once finished, open QuickBooks Desktop again and check whether the crashing issue got resolved. If it still persists, follow the next method.
 
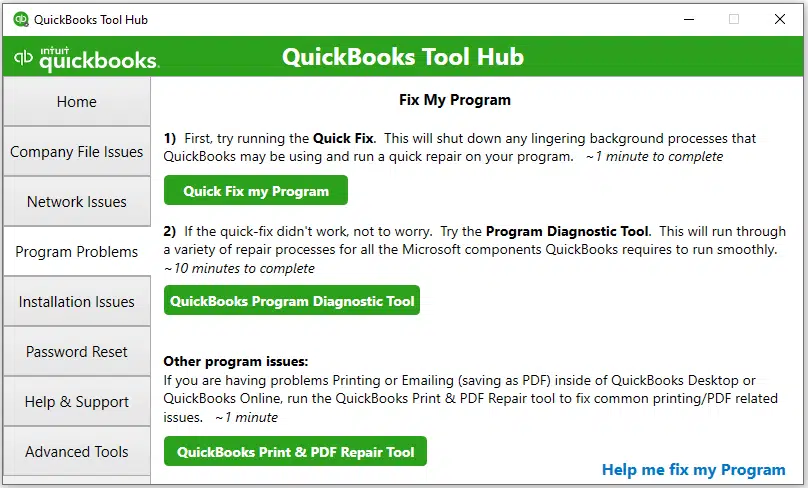
Method 2: Run Quick Fix My Program
·         Download and install QuickBooks Tool Hub
·         When the tool is installed, go to the Program Problems tab and select Quick Fix my Program.
·         It may take a while to complete
·         Reopen QuickBooks Desktop after it's finished.
 
 
701 days ago
Unfiled. Edited by john levi 701 days ago
Seo2topp is the best social media marketing company in India. Seo2Topp offers social media marketing services guided by performance to increase your brand recognition, engagement, and traffic. Our marketing professionals use their long-standing expertise to establish efficient marketing strategies for social media that serve as the path to achieving your business objectives.
 
728 days ago
Unfiled. Edited by john levi 728 days ago
john l Email Server Issue When Using QuickBooks
A Yahoo email address has been the most common source of this issue. To address it, we provide several suggestions. All or some of these solutions may be necessary to get to the bottom of what's wrong. Follow the steps in the correct sequence for the best results.
There are several options when it comes to finding a fix for methods for Error: Could not connect to the email server problem. Let's take a closer look at each of the options. Alternatively, you can dial 1-800-761-1787 and speak to our certified technicians for quick and precise help.
 
Step 1: Make sure you're running the most recent version
·         Navigate to the "Check for new releases" page.
·         Next, be sure that a product has been chosen. Click the 'Change link' and choose 'QuickBooks product' from the drop-down menu if it isn't.
·         To download the 'update file,' click the 'update' button.
·         Lastly, click on 'Setup automatic updates' to see how to have QuickBooks download and install any new updates on their own.
 
Step 2: Verify the settings in the webmail preferences if necessary
·         Go to the 'Edit' menu and select 'Preferences' option.
·         On the left pane, pick the 'Send forms option.'
·         Choosing 'Edit' after selecting 'My preferences' will allow the user to change the email account they are currently using.
·         Next, in the 'update email info page,' go to the 'SMTP Server information' area and enter the server’s name and port' from the email service provider settings. 
·         Set up the email service on the QuickBooks desktop by consulting the "SMTP Server" and "Ports" lists.


Contact Support


Please check out our How-to Guide and FAQ first to see if your question is already answered! :)

If you have a feature request, please add it to this pad. Thanks!


Log in / Sign up